Materials & Processes
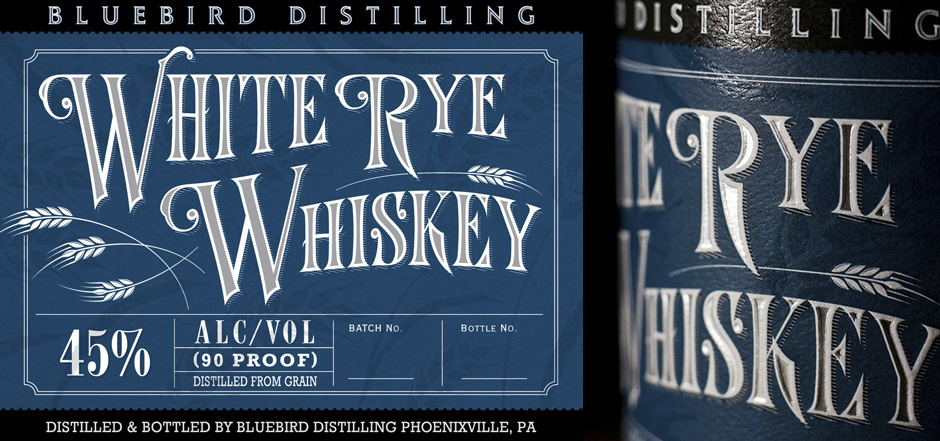
I frequently find myself trying to explain how much depth, dimension, texture and sexy tactile-appeal a real, printed label will have – particularly in comparison with the flat, cold digital files I’m usually reviewing with my clients. So here are some examples to illustrate what I’m talking about. On the left of each image is a screen-capture of the digital layout, as viewed on a computer screen. This is the sort of image that we review while fine tuning art and making type corrections, etc. On the right of each image is a photo showing how the printed label looks (and feels!).
I often talk about “materials and processes” and how important they are in bringing a label to life – things like paper selection/texture, embossing, metallic inks, metal foils, matte and gloss varnish treatments. Those things can be simulated to some degree, for sake of proofing. But they only truly come to life when ink and paper come together in the real world.
As an integral part of my process, I consider all applicable printing methods and materials – and specify them explicitly to my fantastic print vendors – to ensure the results I’m trying to achieve. Don’t assume it will happen automatically with any given print job. There are many ways a label can fall flat at production. Only experience (past mistakes), thoughtful materials specifications and working pro-actively with the printer will get you there. It usually costs a little more (but not always), and often not as much as people think – to get top-shelf results like you see below.
Have a look.


