How to Fit Labels to Tapered Glass Bottles
A label which is applied to a tapered bottle has to be specially designed to wrap around the tapered glass, otherwise it will appear distorted and curve upward at the sides, like a smile. And vertical lines, which were parallel in the layout, will appear to converge toward the top. That won’t do.
For years I’ve relied on die makers to provide me with the shapes needed to fit artwork to tapered bottles. But I knew that one day I was going to have to figure this out for myself. For one thing, relying on outside vendors adds at least three days to the process. Besides that, you have to ship them a physical bottle (which is laser scanned). Often, there is only one bottle available – a sample or prototype from the manufacturer. I can’t always part with my only sample; I need them for measurements, mockups, photos, on-the-fly testing or modifications and other things. So for these and a few other reasons, I decided to buckle down and crack this nut once and for all.
I’m sure there’s a fairly uncomplicated way to do this with some basic math, but – being an “artist” of sorts – I’m pretty content with this purely visual technique. It works.
How to derive the correct arc for a label applied to a tapered, round bottle:
1. Get a drawing of the bottle. For most spirits bottles the manufacturer and model name are known and a vector PDF drawing can be easily obtained online or from a rep.
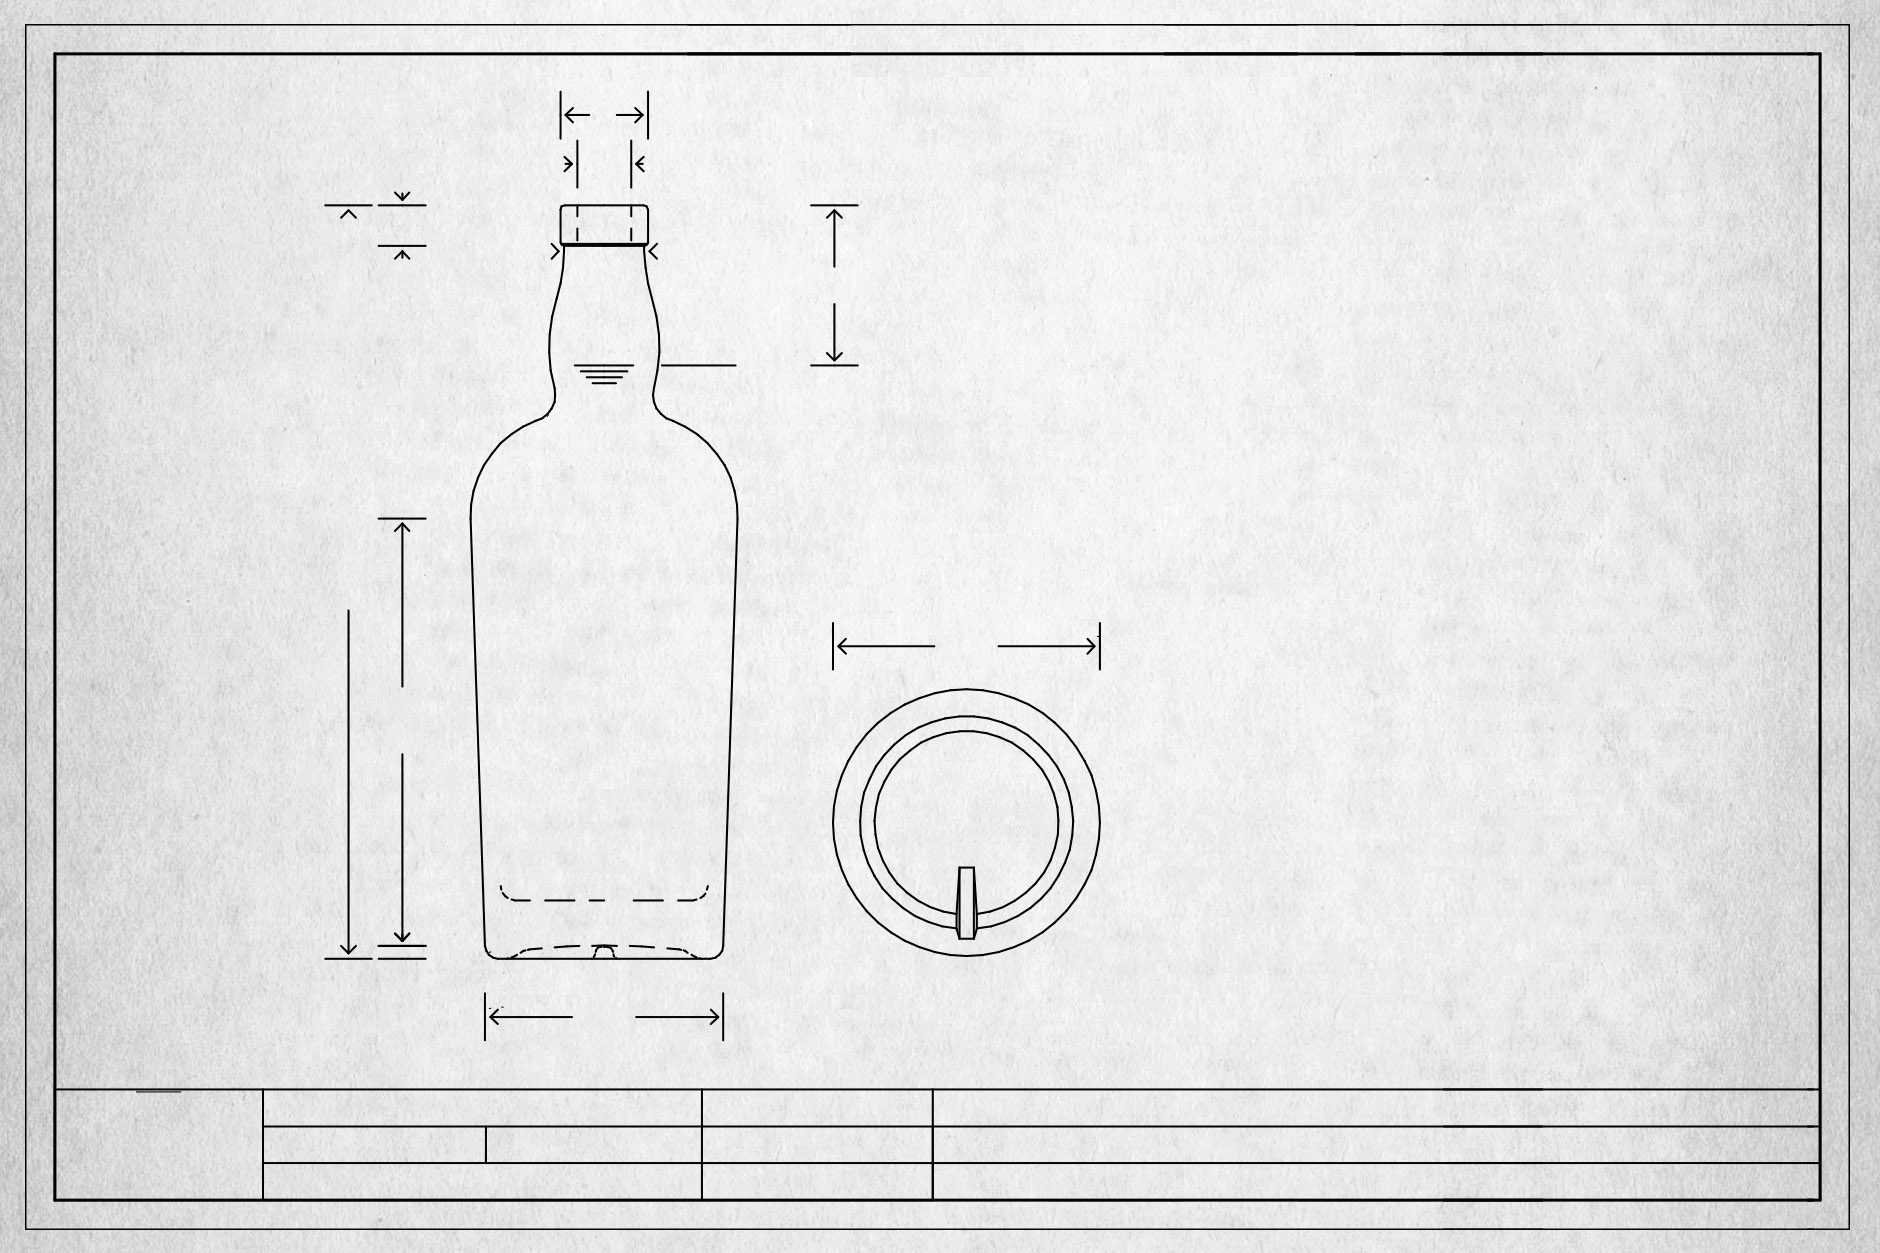
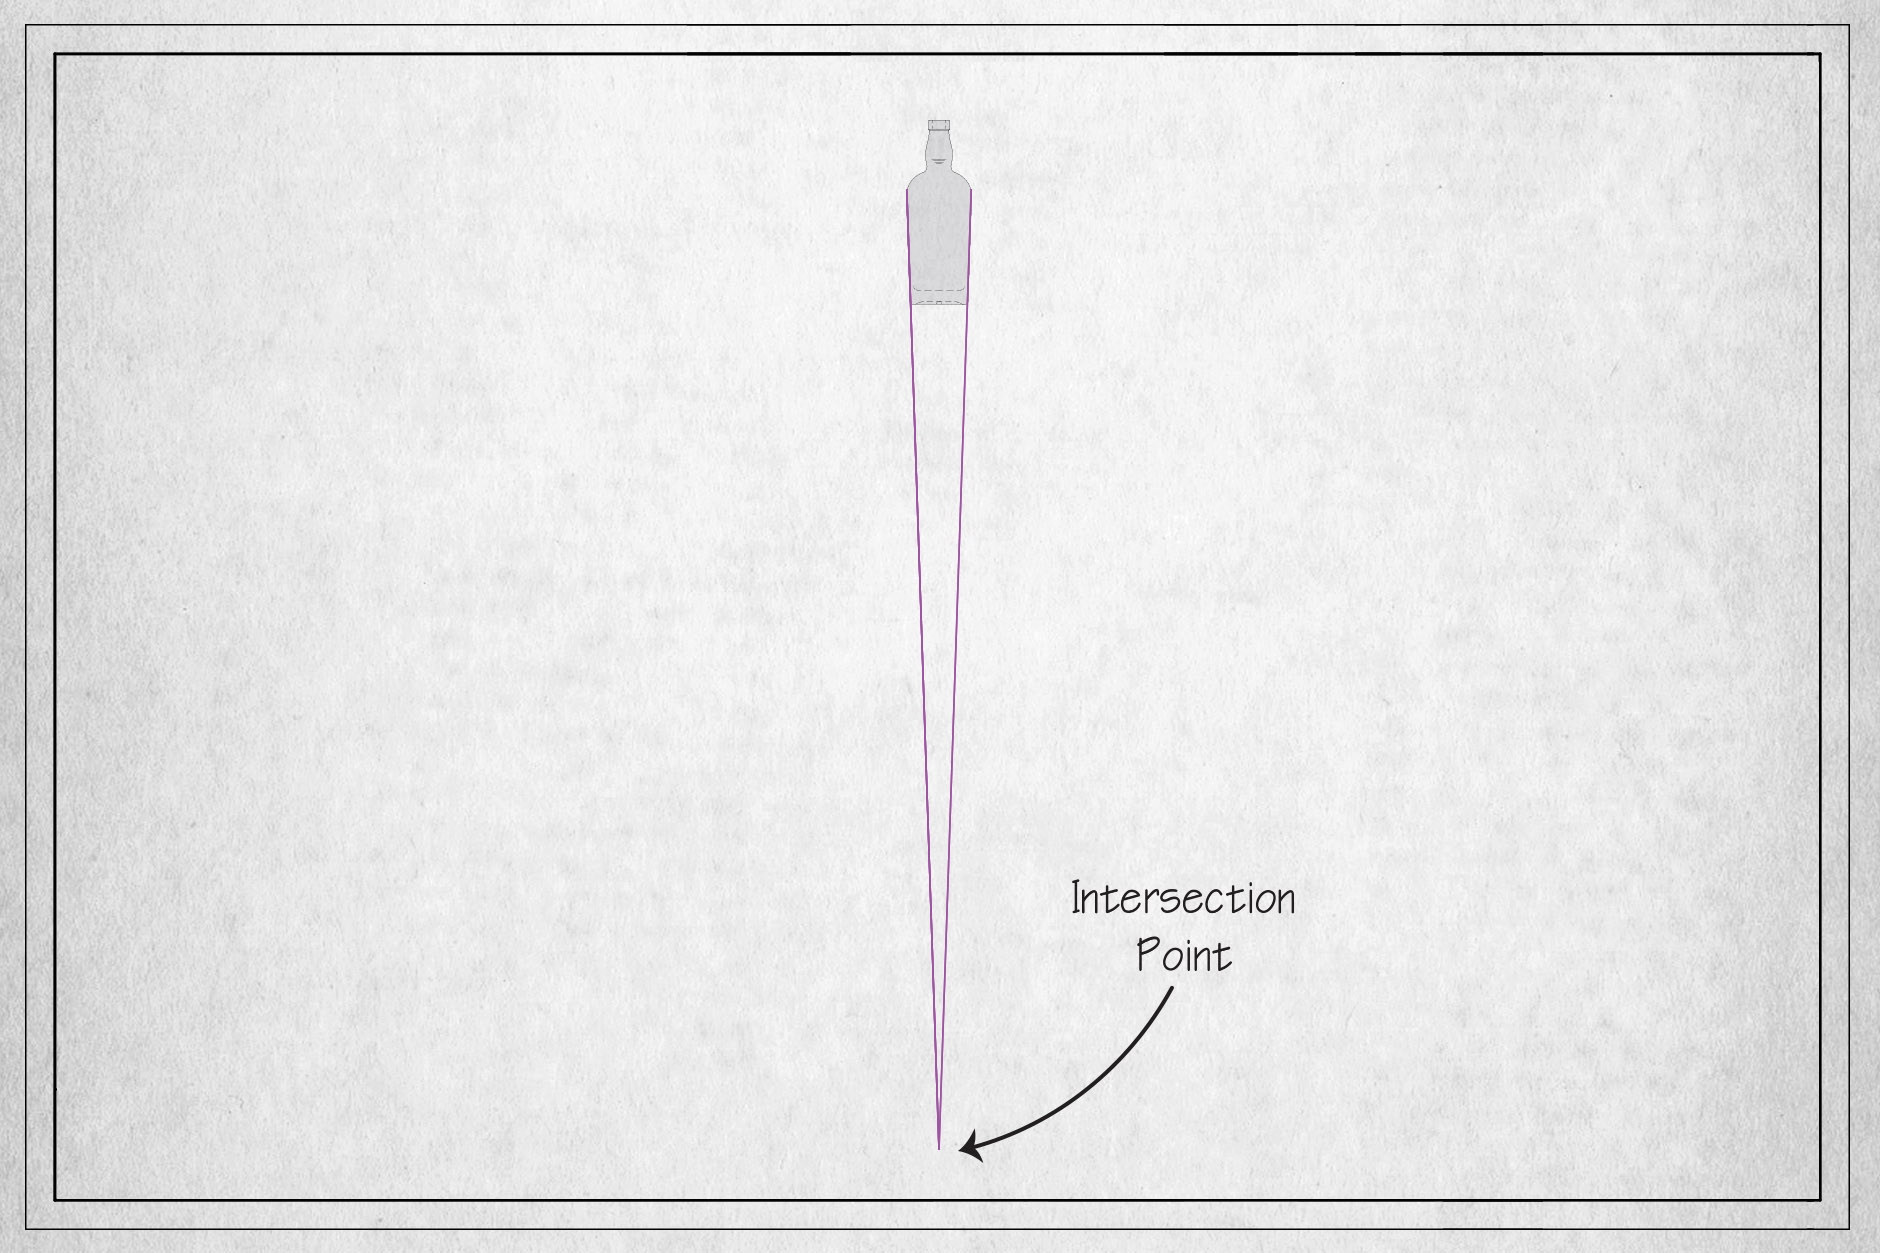
2. A tapered bottle is a section of a cone. Complete the theoretical cone of the bottle until you find the point where the lines that define two sides would intersect. SEE PURPLE LINES, below. I should note that I do all this in Adobe Illustrator. Using the vector editing tools in the program I can be sure that everything I’m doing is perfectly center-aligned, symmetrical, etc.
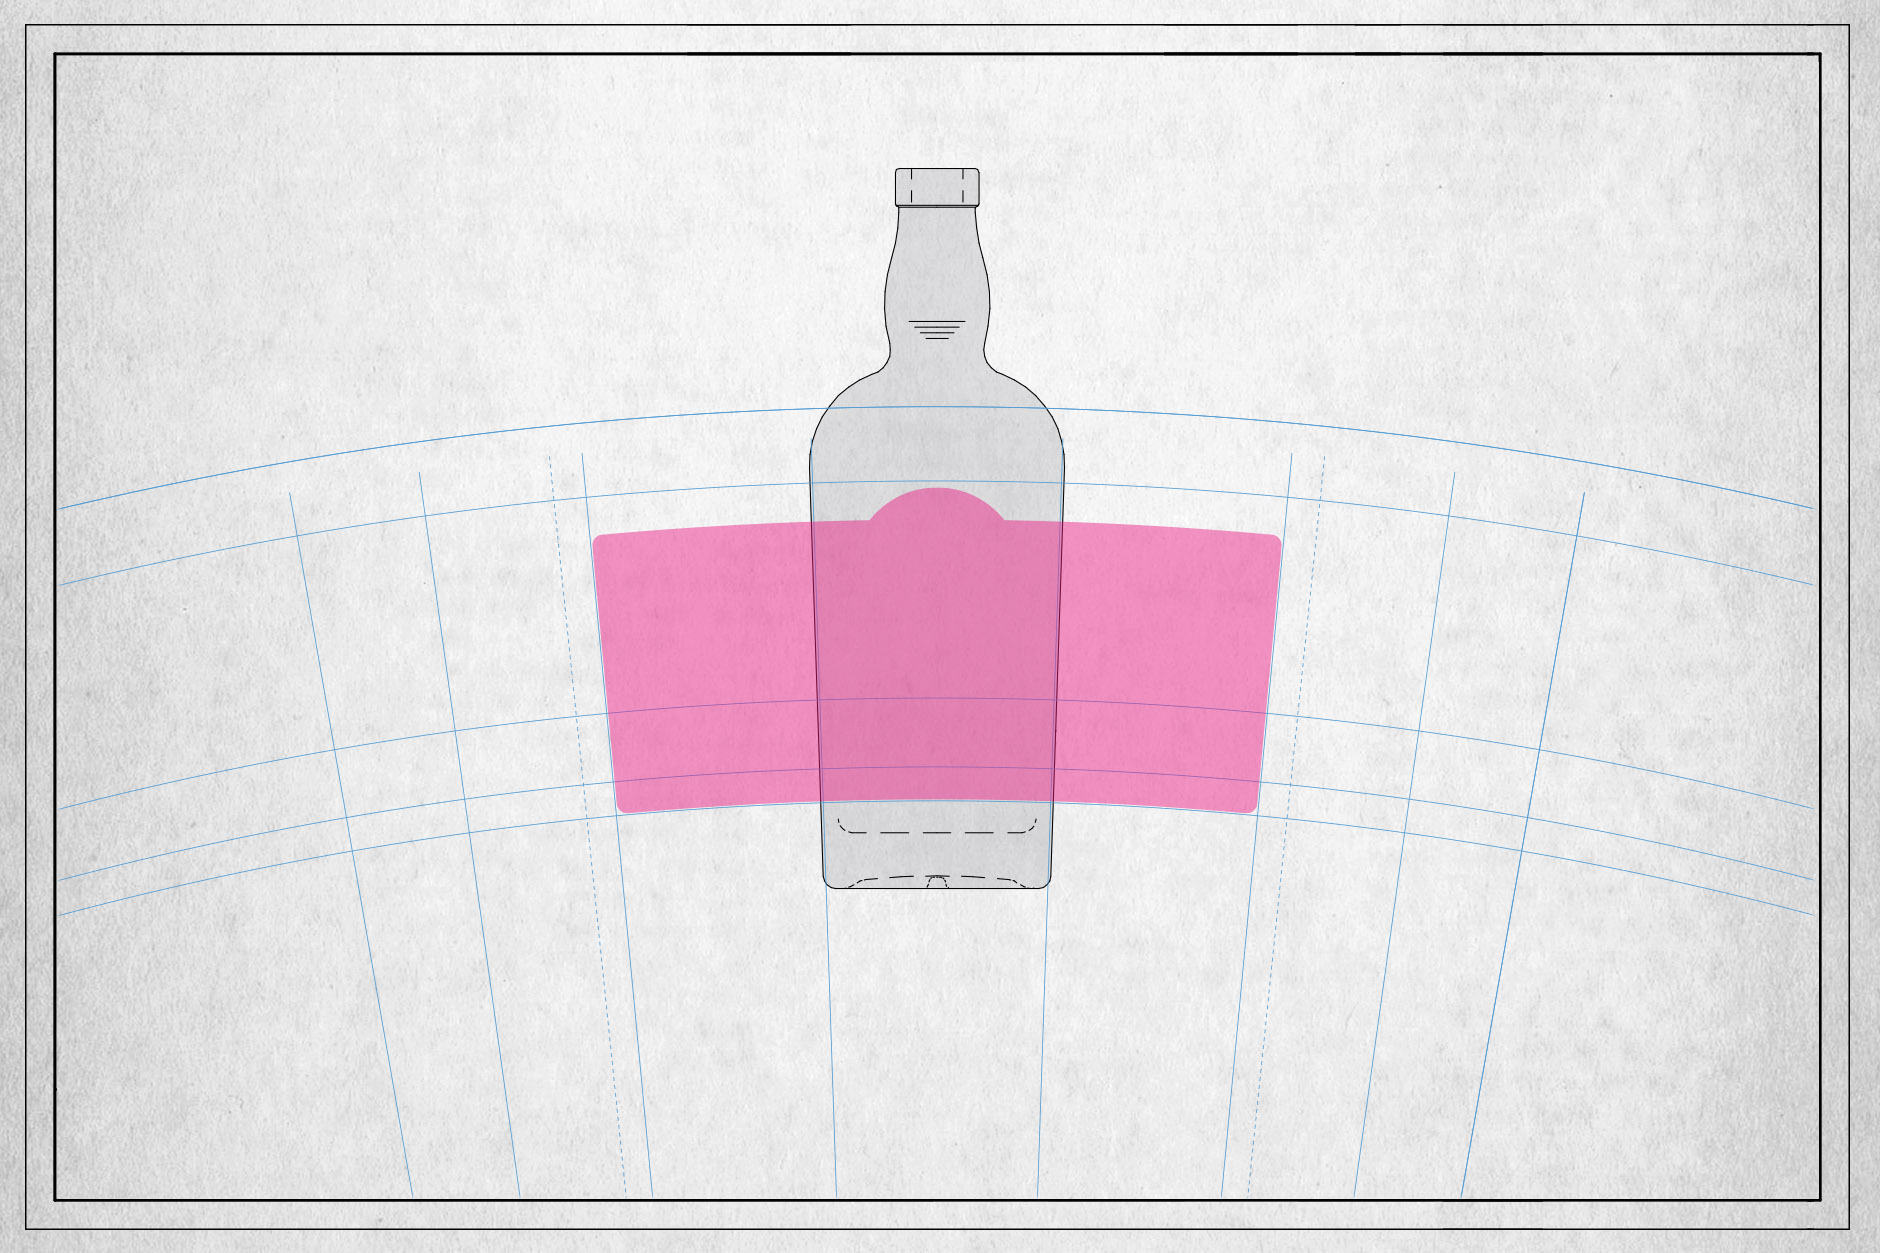
3. Using that same intersection point (from step 2) as the CENTER for everything else that follows, create a series of concentric circles. Use these circles to define the top and bottom edges of your label and any other lateral lines you may need within the label.
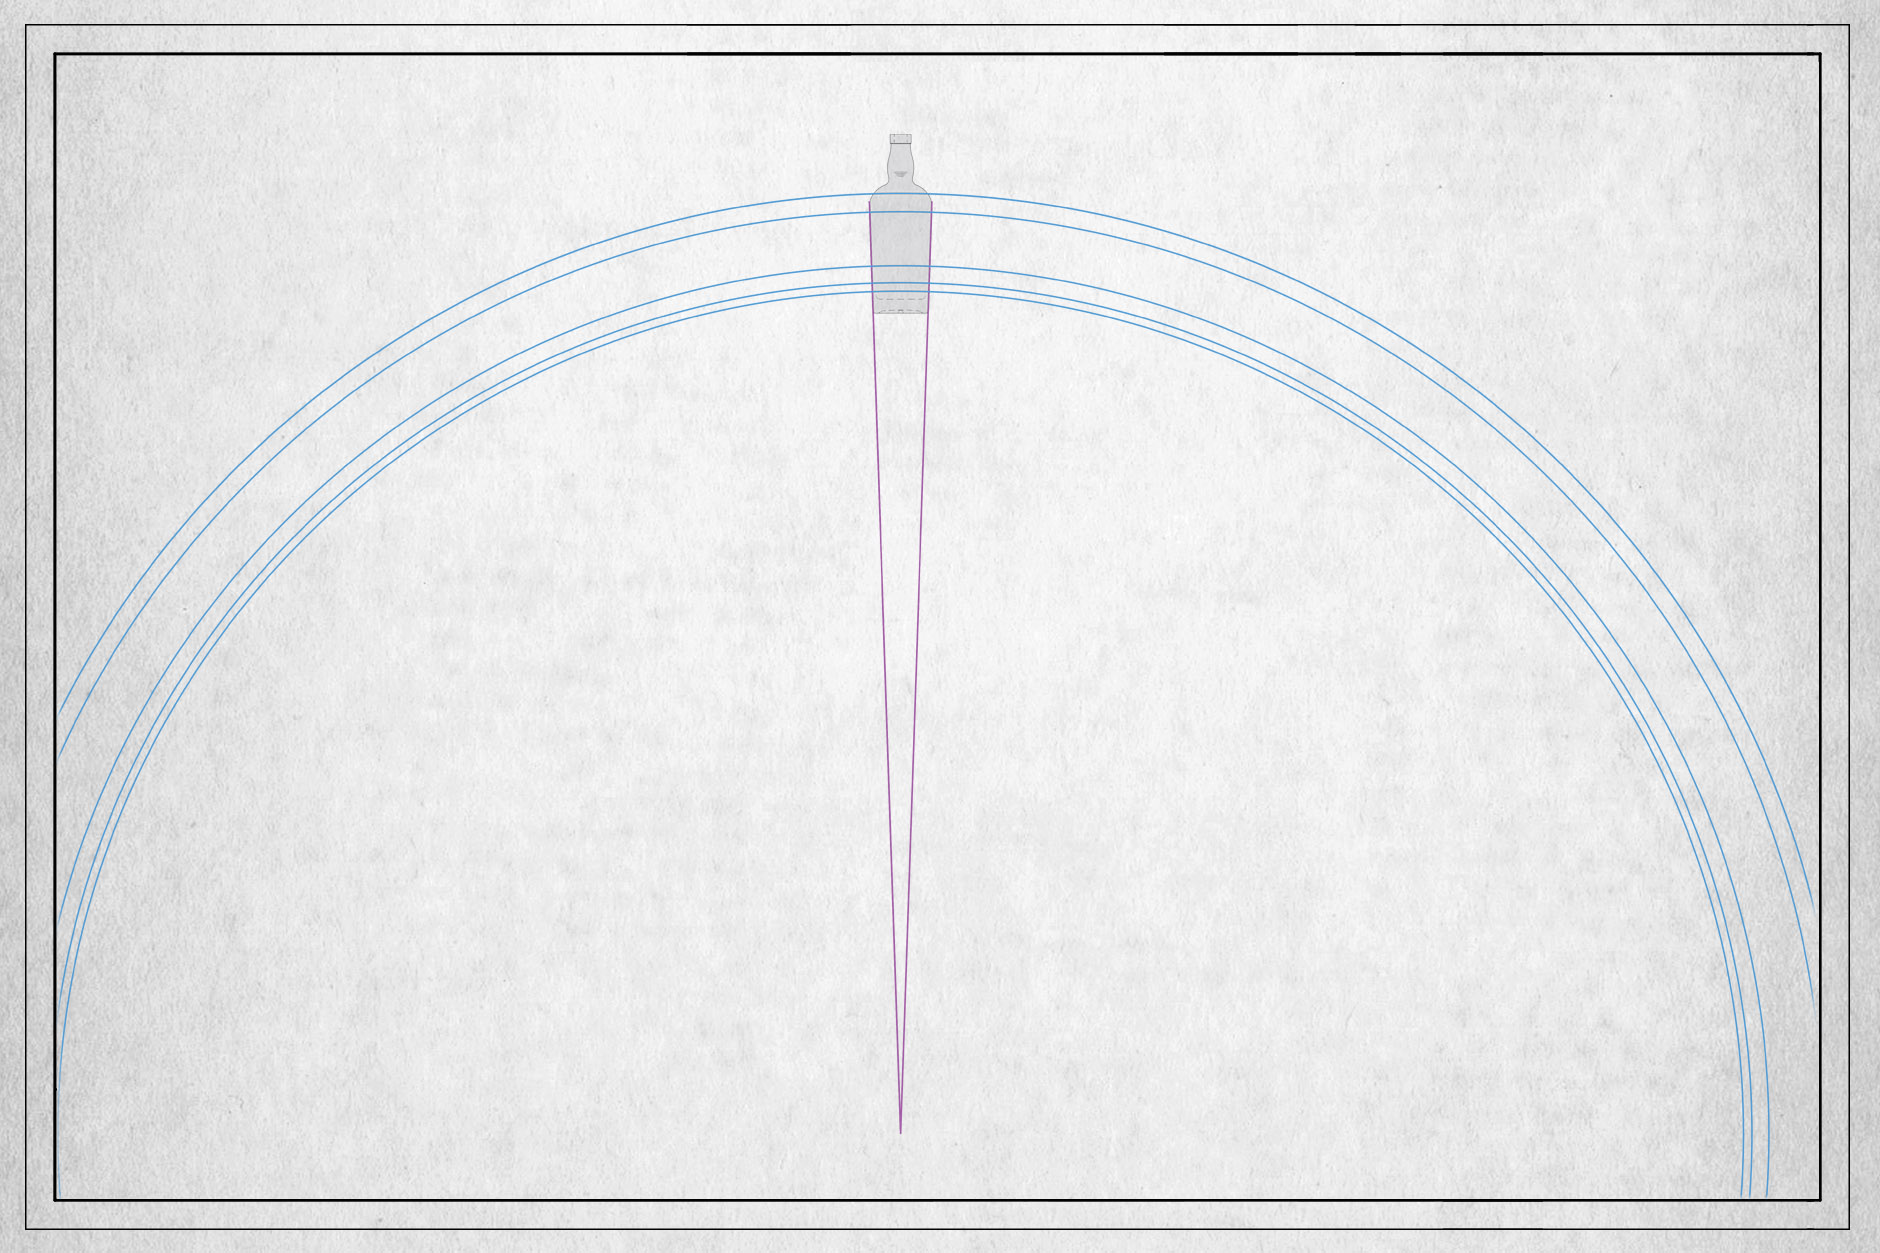
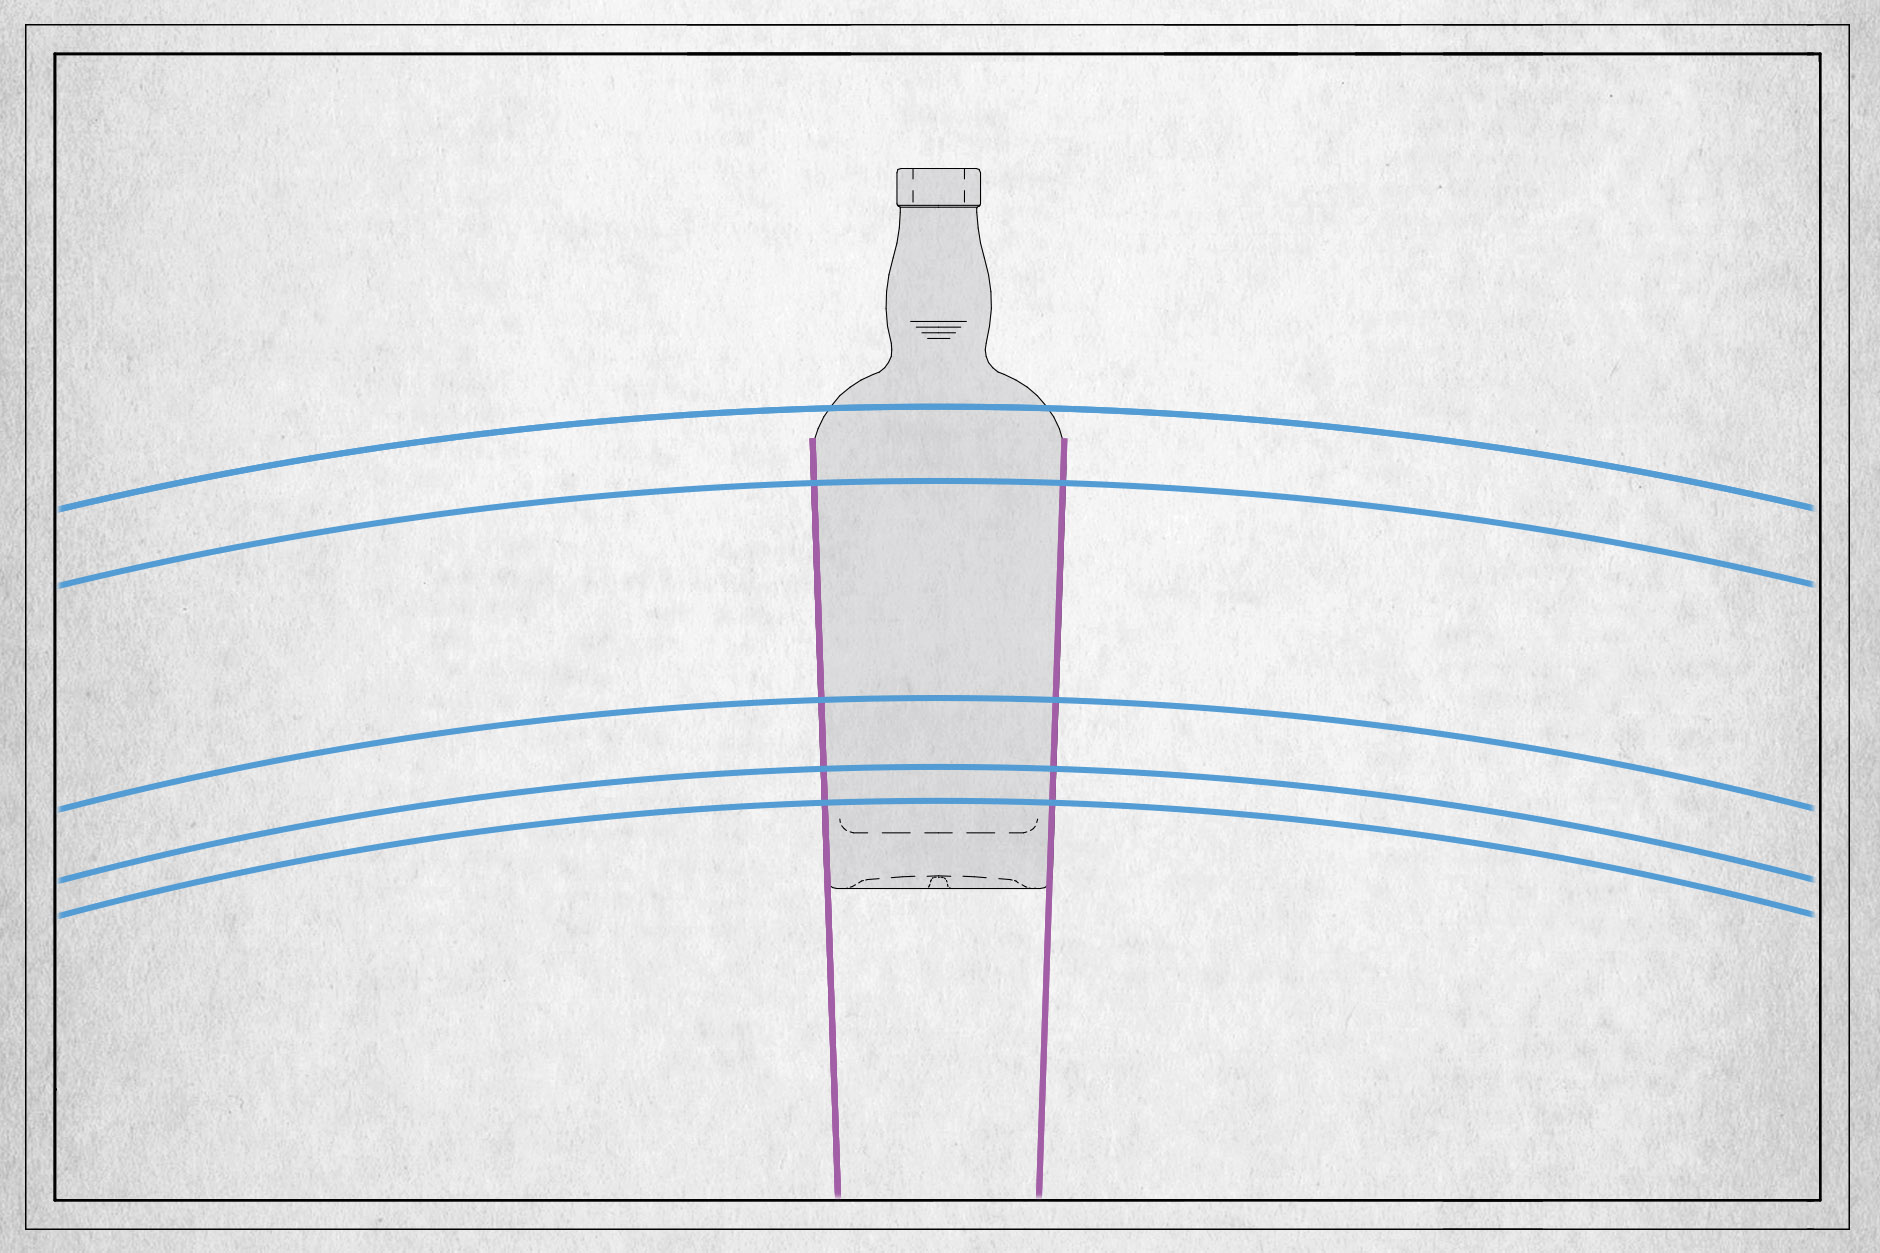
4. Create additional rays/meridians/parallels starting from that same intersection/center point to define the vertical edges (left and right sides) of your label. Don’t just draw lines out randomly from the center to any old point. You have to create a perfect radius, meaning that the the lines you make will be perpendicular to the tangent line where they intersect one of the circles from step 3. These are “rays” emanating from the center straight out.

5. Using the lines that you just created as guides, you can now define an outline for your dieline and guides for all artwork within the label as well. When wrapped around the bottle, all horizontal lines will indeed appear as true horizontal lines, and all vertical lines will be right as rain.
In the past year or so, I’ve created dielines and artwork for quite a number of tapered bottles with this technique. They have all come out fitting like a glove.